How to setup Android Studio..
- Nandita Gaur

- May 9, 2019
- 2 min read
Updated: Feb 11, 2020
"Good developers use tools". They don't waste their hours and days in setting up their environment. So, to save you from wasting your time and your unnecessary looking up here and there, I present a complete Android Setup guide.
Setting up Android Studio by following this blog is only an hour long process , given your internet connectivity is good.
Lets begin...
1. Click on this link to get redirected to Official Android Studio website:
2. Click on Download Android Studio if your system is operating on 64 bit Windows.

3. Read and accept the Terms and Conditions.Then click on DOWNLOAD ANDROID STUDIO FOR WINDOWS.

4. Find .exe file of android studio. If u can't find then press Ctrl+J in your browser to view all the Downloads. Choose View in folder option. Your executable file must look something like this:

5. Open it and the setup will load. After a few seconds Welcome Screen will pop up.
Click Next.

6. Although this dialog box says "uncheck the components you don't want to install", but I suggest check all the components.

7. Now browse the location where you want to keep Android folder, or just simply click Next.

8. Now if you want to view Android shortcut on start menu, then proceed to click Install. But if you want to view this shortcut under some other folder, then choose that folder and click Install.

9. After the installations gets completed, click Next

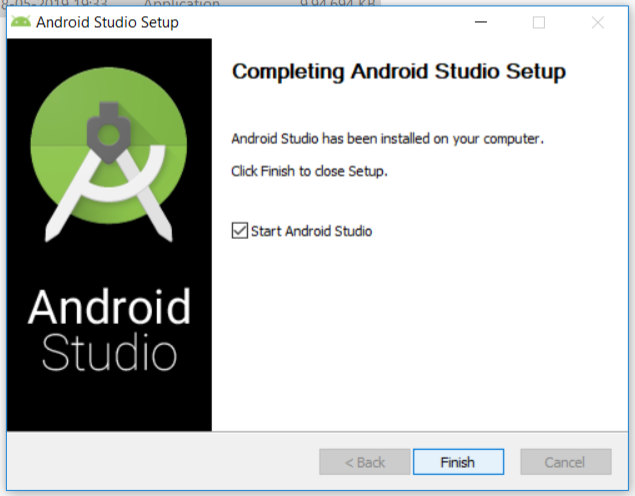
10. Check Start Android Studio and click on Finish.
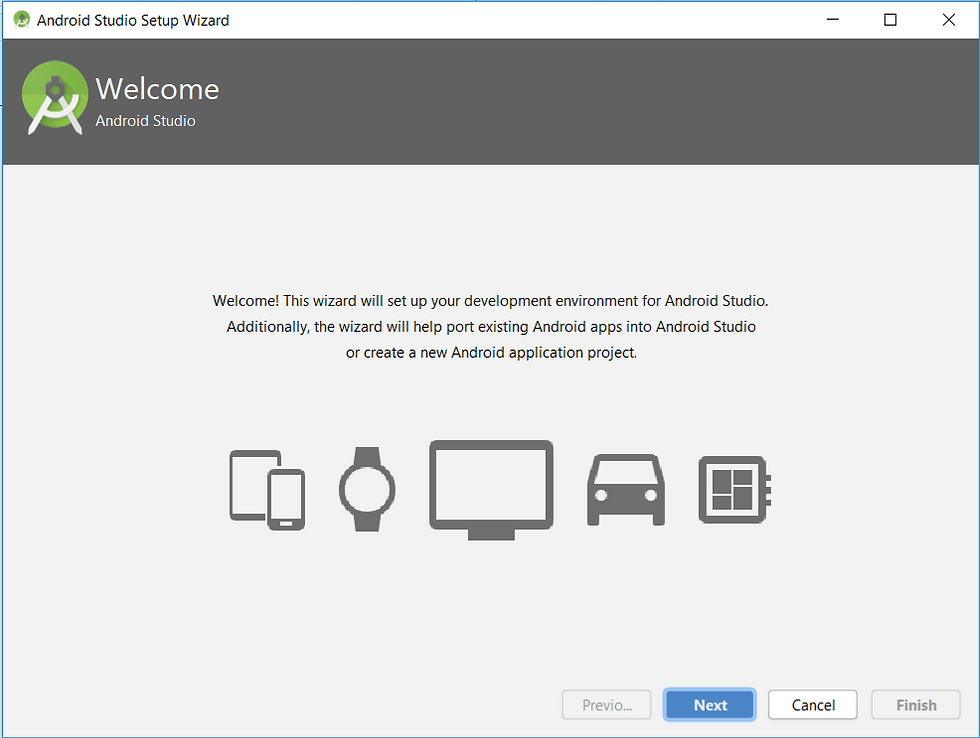
11. Congratulations! your Android Studio has been successfully set up if you see a pop up like this.

12. This dialog box asks whether you want to share which tool you use frequently, how much time you spend..etc. If you feel comfortable in sharing your personal usage of data, then click on Send usage statistics to Google. I would suggest not to share this and press Don't Send.

13. Now its time to set the best Development Environment by downloading all handful tools and components. Click Next.
14. Choose Standard if you are not so much familiar with android studio and its tools, otherwise you can Customize it too. Click Next to proceed.

15. Choose dark theme to have a coder like feel. Otherwise light theme is easy on eyes in locating tools. Theme can also be changed afterwards. Click Next to proceed.

16. Now click Finish to download all these necessary components.

17. Zip files of above components will get downloaded and unzipped all by itself. It is advisable not to interrupt the process. After downloading all the components, click on Finish.

18. Its done..!! Now you can start using Android Studio.

All the best for your development work...!!!
Comments